Origin


Resu, North Garo Hills, Meghalaya 794108

Showing posts with label Fedora. Show all posts

Tuesday, 21 October 2014

Simple AngularJS $http request to fetch a CouchDB document

We begin first by installing CouchDB:

#yum install couchdb

After installation, we start the CouchDB server:

#service couchdb start

To see if it is running, type

#curl http://127.0.0.1:5984/ in the console, or type

http://127.0.0.1:5984/

in the browser's address bar. Either way, if all is good, you should get the JSON response:

{"couchdb":"Welcome","uuid":"a8e76df6219160824c631647aa7d9f1c","version":"1.6.1","vendor":{"version":"1.6.1","name":"The Apache Software Foundation"}}

I will skip all the curl -X CRUD operations here (you can refer it anywhere later) and we will create an example database and a document manually.

Go to http://127.0.0.1:5984/_utils/ in your browser. This is your FUTON, CouchDB's interface.

Click on "+ Create Database ... " button located at the top left corner of your Futon interface. Let us call it mars. Inside our newly created database, is another sub-interface. We click on the "+ New Document" button to create one, and the first field you see is the _id field with a 32-character hexadecimal string value, something like, 7df239fb136c51dffebf364d14000878. This is the UUID. Here, I will replace the string with satellite.


Now let us add on more field: click the "+ Add Field" button. We give the field name name and its value phobos. Save the document by clicking the "Save Document" button.

Upon clicking on the "Source" tab, you will see a structured JSON document like this:


{
   "_id": "satellite",
   "_rev": "1-70b8ebd5210674e1c3a381f0143a1d53",
   "name": "phobos"
}

We now have a JSON data in CouchDB, let us try to fetch it from inside an AngularJS controller using the $http service.

 var url = 'http://127.0.0.1:5984/mars/satellite';

 $http.get(url)
    .success(function (data, status, headers, config) {

    angular.forEach(data, function(value, key) {
$log.log(key);
$log.log(value);

    });
    }).
    error(function(data, status, headers, config) {
      // log error
    });

The console response you will get is the following:

XMLHttpRequest cannot load http://127.0.0.1:5984/mars/satellite. No 'Access-Control-Allow-Origin' header is present on the requested resource. Origin 'http://localhost' is therefore not allowed access.

This is because we have not set the [httpd] and the [cors] sections of our CouchDB server's local.ini file. Navigate to it

#cd /etc/couchdb

and open the local.ini file

#gedit local.ini

In the [httpd] section, append

enable_cors = true

and add another section

[cors]
origins = *
credentials = true
origins = http://localhost, https://localhost
methods = GET, POST, PUT, DELETE
headers = Authorization, Cookie
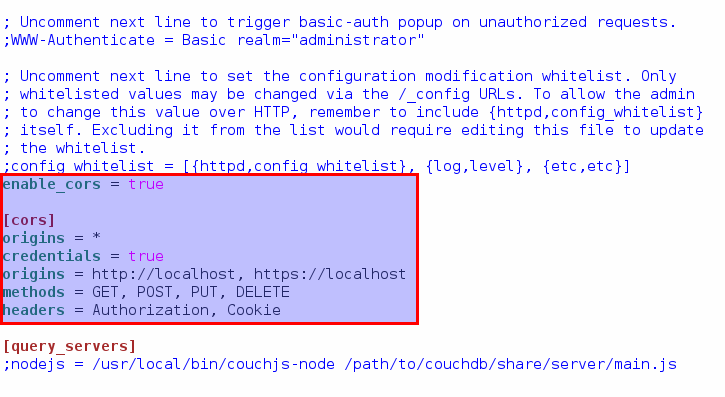

(you can do without the origins, methods, headers also for now)

Save, and restart the server

#service couchdb restart

Now you'll have your JSON data!

Sunday, 3 August 2014

Installing hhcount.sty to generate Tally Marks in LaTeX document in Fedora 20

1. Download the file hhcount.sty and save it (like in your Downloads folder)

2. Navigate to /usr/share/texlive/texmf-dist/tex/latex/
    #cd /usr/share/texlive/texmf-dist/tex/latex/
    and create a folder named hhcount
    #mkdir hhcount

3. Now navigate back to your Downloads folder (or wherever you downloaded hhcount.sty) file and
    move/copy the file to the newly created folder.
    #mv hhcount.sty /usr/share/texlive/texmf-dist/tex/latex/hhcount

4. Run the texhash command
    #texhash

5. Since hhcount.sty is dependent on hhutils0.sty, you need to download it again and like in
    the previous steps, create a folder hhutils0 inside /usr/share/texlive/texmf-dist/tex/latex/ and move
  hhutils0.sty there. Again run texhash command.

6. Now include \usepackage{hhcount} in your tex file and wherever you need to include tally  
    marks, use \fcsore{n}, where n is the frequency number. If you need to put a tally mark against 5,        use \fcscore{5}, if against 7 use \fcscore{7}. Run LaTeX, and you'll get the tally marks in  
     your document as

Wednesday, 11 June 2014

The errors after uninstalling satya164's "Elegance Colors" GNOME Shell Theme

A lot who have tried satya164's "Elegance Colors" GNOME Shell Theme in Fedora 20 know that upon doing

#yum update

the errors comes out as follows:


"download.opensuse.org_repositories_home_satya164_elegance-colors_Fedora_20_             | 1.6 kB  00:00:00     
http://download.opensuse.org/repositories/home%3A/satya164%3A/elegance-colors/Fedora_20/x86_64/repodata/repomd.xml: [Errno 14] HTTP Error 404 - Not Found
Trying other mirror.


 One of the configured repositories failed (added from: http://download.opensuse.org/repositories/home:/satya164:/elegance-colors/Fedora_20/x86_64/),
 and yum doesn't have enough cached data to continue." 

Navigate to

#cd /etc/yum.repos.d

and list them all

#ls

You'll see the following three repo files still there: 

download.opensuse.org_repositories_home_satya164_elegance-colors_Fedora_20_.repo
download.opensuse.org_repositories_home_satya164_elegance-colors_Fedora_20_x86_64_gnome-shell-theme-elegance-colors-2.9-3.2.x86_64.rpm.repo
download.opensuse.org_repositories_home_satya164_elegance-colors_Fedora_20_x86_64_.repo


Next you remove them all

#rm download.opensuse.org_repositories_home_satya164_elegance-colors_Fedora_20_.repo
#rm download.opensuse.org_repositories_home_satya164_elegance-colors_Fedora_20_x86_64_gnome-shell-theme-elegance-colors-2.9-3.2.x86_64.rpm.repo
#rm download.opensuse.org_repositories_home_satya164_elegance-colors_Fedora_20_x86_64_.repo

Do the update

#yum update

And it's done!

Thursday, 15 May 2014

Install Icon packages on Fedora 20

(It's assumed that GNOME Tweak Tool is already installed in the system.)

Icons are mostly packaged in tar.gz or .ZIP file. Let's get a couple of them from http://gnome-look.org/: Square-Beam 1.0 and The Circle 0.2 and install and use them. Click on their respective download links and get the Square-Beam_1_0.tar.gz and TheCircle.zip packages.

Now, navigate to the /home/username/Downloads folder (or to whichever directory you have downloaded them to):

# cd /home/username/Downloads

Extract Square-Beam_1_0.tar.gz to the /usr/share/icons directory:

# tar xzf Square-Beam_1_0.tar.gz -C /usr/share/icons


Unzip TheCircle.zip at the /usr/share/icons directory:

# unzip TheCircle.zip -d /usr/share/icons

Next, open GNOME Tweak Tool and select one of them, say, Square-Beam


Here's a glimpse of the Square-Beam 1.0 icon set:


And of The Circle 0.2:


Install GNOME Tweak Tool on Fedora 20 (Heisenbug)

Here's GNOME Tweak Tool for you from wiki.gnome.org


A very simple command does the installation:

# yum install gnome-tweak-tool

Along with it, the gnome-shell-theme and the common light-theme-gnome (which includes Ubuntu's default Ambiance and Radiance themes) can also be installed:

# yum install gnome-shell-theme-*
# yum install light-theme-gnome

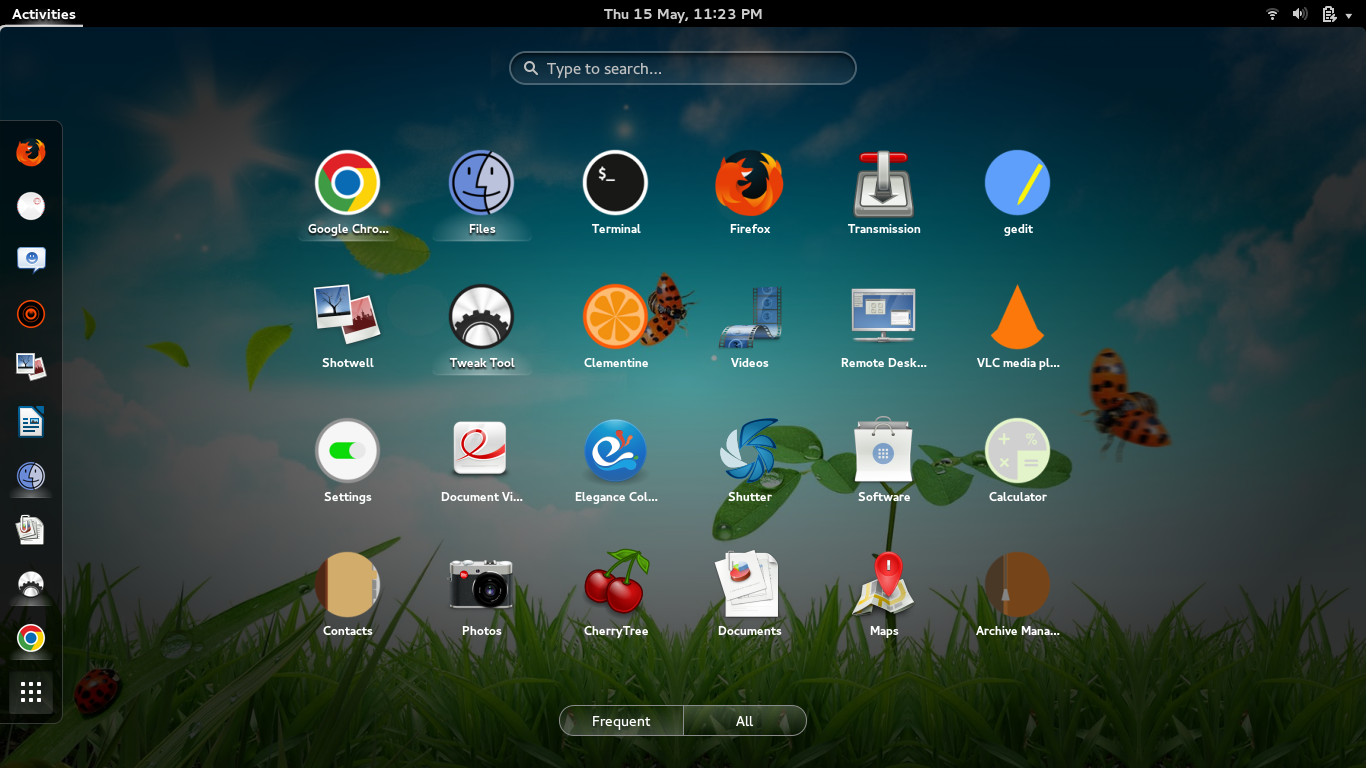
Now in GNOME shell's Activity menu, click on Utilities, and you'll find the Tweak Tool: 


Monday, 12 May 2014

Remove Old/Multiple Linux Kernels

After an update, there's always a possibility to see some more kernel entries on your GRUB on booting. A quick listing can be done:

# rpm -q kernel 

(the lastest is at the bottom, which also can be produced typing # uname -r )

We next make use of the package-cleanup tool in yum-utils to limit the number of kernels desired. If yum-utils isn't installed, do

# yum install yum-utils

Next set the number of kernels to the desired count (say, 2)

# package-cleanup --old kernels --count=2

Make the amount of installed kernels permanent
# gedit /etc/yum.conf 

and set installonly_limit = 2

Running your first "Hello World" C program in the Terminal

First check if you already have GCC (GNU Compiler Collection) installed in your system. Type # gcc --version (or # which gcc). If not, install it first: # yum install gcc or # yum install gcc-c++

Next open a text editor (GEDIT, say) and write your first C program.

# gedit hello.c

The hello.c program's source code can be something like

#include <stdio.h>

int main()

{
printf("Hello World");
return 0;
}

Next compile  and create an executable file

# gcc hello.c -o hello

Now execute your program

# ./hello

How do you know your operating system in 32-bit or 64-bit?

Run this command in the Terminal

# uname -m

If the output is x86_64, it's a 64-bit kernel. And if it's i686, it's a 32-bit kernel.

Saturday, 10 May 2014

Find out the maximum RAM supported by your machine

Type the command

# dmidecode -t 16

or to be precise

# dmidecode -t 16 | grep "Maximum Capacity"


Friday, 9 May 2014

Check your Internet speed via the Terminal

We first need to install pip, a package manager for Python software packages [1].

# yum install python-pip

Next, we install the Python package called speedtest-cli 0.2.7

# pip install speedtest-cli

And finally, to get your Internet download speed, type the following command:

# speedtest-cli

---------------------------------------------------------------
[1]. To see if you have already installed pip, type the command #pip --version. If pip is already installed, you'll get an output like pip 1.4.1 from /usr/lib/python2.7/site-packages (python 2.7)